Fast AI 2 transformations
Data loading is at the heart of any machine learning project and with Fast AI 2 this has become easier and more transparent. In this post I’ll look at the data transforms, as well as how to get some insights into what is happening where and when, during the data loading and data transformation steps.
Notes to the reader
In this post I will only be exploring Fast AI 2, more specifically the way they have opened up the data loading pipeline, to enable sophisticated data processing, as well as easy ways of inspecting the flow of data. I will assume you are familiar with some kind of ML pipeline, be it Tensorflow, Pytorch, Keras or something else, as I won’t go into details of why there are this or that step.
Motivation
Typically, regardless of framework, you will find very simplistic examples of machine learning regarding images. Images are the canonical example, usually used for classification, on neatly preprocessed dataset. The reality is often quite different though. You may not have datasets already sorted through, your data may not be plain images, some enrichment needs to happen. Your challenges will vary - as do mine - but almost certainly they will not look like the hello world example you often see.
I have read the Fast AI 2 paper and been following Fast.ai since version 1, and I like what I see. Both in terms of flexibility on the pure machine learning side, but most importantly on the data loading and transformation side. Often data loading is neglegted, maybe its because explaining machine learning is difficult enough, or maybe its something else. In any case if your data comes out of wonky sensors or is a mish-mash of stuff, you really have to do quite a few things before you can move on to the exciting machine learning part that we all want to see.
Changelog
- 18:15, 2020-06-16: Added the very cool show_training_loop() call
- 22:54, 2020-06-17: Added the equally cool data block summary() call
- 17:25, 2020-06-20: Rewrote for clarity
Stages of data loading
The paper states that the Dataloader provides 15 extension points via customizable methods (section 4.6). And the they represent the 15 stages of data loading the FastAI team have identified. A remarkable statement of flexiblity, but I can’t intuitively visualize what the individual steps all are. But I really want to know - therefore this writeup, I’ll peel off layer by layer starting with, you guessed it the canonical hello world example.
Other reasons for following along
I do like Python the programming language, before you ask of course version 3 (But v2 was pretty cool also). But again the team behind FastAI version 2 have pushed the limit of what the Python the programming language was supposed to do. Although there are more elegant solutions in other langugages, I belive they have struck a pretty decent balance - the endgoal is not language design but rather enabling ML. A pretty significant difference and with that they are using and abusing Python to provide us with fantastic functionality.
Setup - hello world
This is the canonical ‘hello world’ example from fast ai 2 I could find, in this case the first notebook from the course. The next few cells are just setting up and you can choose a different starting point. Our goal is to get to a working data loader we can call one_batch on. Once you have assembled your batch, training is next.
# Basic imports for our example
from fastai2.vision.all import *
from nbdev.showdoc import *
# For this notebook you don't need a GPU, and often there are issue after sleep on linux
# set use_cuda to False safely here as it doesn't impact the example
# default_device(use_cuda=False)
# Consistent results under development
set_seed(2)

# Set a really small batch size, we are just interested in the transformations and their order.
bs = 4
help(untar_data)
Help on function untar_data in module fastai2.data.external:

untar_data(url, fname=None, dest=None, c_key='data', force_download=False, extract_func=<function file_extract at 0x7fd500dfc680>)
    Download `url` to `fname` if `dest` doesn't exist, and un-tgz or unzip to folder `dest`.
path = untar_data(URLs.PETS)
Path.BASE_PATH = path # display all paths relative to dataset root

path_anno = path/'annotations'
path_img = path/'images'

fnames = get_image_files(path_img)
fnames
(#7390) [Path('images/Bombay_126.jpg'),Path('images/havanese_6.jpg'),Path('images/Siamese_46.jpg'),Path('images/american_pit_bull_terrier_138.jpg'),Path('images/pomeranian_171.jpg'),Path('images/leonberger_58.jpg'),Path('images/Russian_Blue_164.jpg'),Path('images/chihuahua_2.jpg'),Path('images/german_shorthaired_128.jpg'),Path('images/great_pyrenees_77.jpg')...]
dls = ImageDataLoaders.from_name_re(
    path, fnames, pat=r'(.+)_\d+.jpg$',
    item_tfms=[Resize(460)], bs=bs,
    batch_tfms=[*aug_transforms(size=224, min_scale=0.75), Normalize.from_stats(*imagenet_stats)])
Cool features first
Before you start with Fast AI you should know of two features, one is show_training_loop the other is summary. The former is used on the Learner the latter on a DataBlock. With Fast AI you can always dive deeper into the codebase. And in many cases helper functions are exposed.
Learner.show_training_loop
from fastai2.test_utils import *

learn = synth_learner(); learn.show_training_loop()
Start Fit
   - begin_fit      : [TrainEvalCallback, Recorder, ProgressCallback]
  Start Epoch Loop
     - begin_epoch    : [Recorder, ProgressCallback]
    Start Train
       - begin_train    : [TrainEvalCallback, Recorder, ProgressCallback]
      Start Batch Loop
         - begin_batch    : []
         - after_pred     : []
         - after_loss     : []
         - after_backward : []
         - after_step     : []
         - after_cancel_batch: []
         - after_batch    : [TrainEvalCallback, Recorder, ProgressCallback]
      End Batch Loop
    End Train
     - after_cancel_train: [Recorder]
     - after_train    : [Recorder, ProgressCallback]
    Start Valid
       - begin_validate : [TrainEvalCallback, Recorder, ProgressCallback]
      Start Batch Loop
         - **CBs same as train batch**: []
      End Batch Loop
    End Valid
     - after_cancel_validate: [Recorder]
     - after_validate : [Recorder, ProgressCallback]
  End Epoch Loop
   - after_cancel_epoch: []
   - after_epoch    : [Recorder]
End Fit
 - after_cancel_fit: []
 - after_fit      : [ProgressCallback]
Very nice, a great overview of what happens at what point during training.
There is even a Learner.summary call which maybe could have showed the training loop as well?
learn.summary()
RegModel (Input shape: ['16 x 1'])
================================================================
Layer (type)         Output Shape         Param #    Trainable
================================================================
RegModel             16 x 1               2          True
________________________________________________________________

Total params: 2
Total trainable params: 2
Total non-trainable params: 0

Optimizer used: functools.partial(<function SGD at 0x7fd4eedaee60>, mom=0.9)
Loss function: FlattenedLoss of MSELoss()

Callbacks:
  - TrainEvalCallback
  - Recorder
  - ProgressCallback
DataBlock.summary
The DataBlock api is pretty cool, but if you access the Fast AI library from one of the DataLoaders you might miss it. You should know about one helper function - the DataBlock.summary. Summary() does a test run of your data load pipeline - and prints to std out while doing so - much like the show_training_loop does.
I’m guessing the reason for mostly returning the data loaders is - that it really is what you want - not get the definition - but the loader from the definition. But it would be cool to quickly get to it and just do the summary. Especially while you are developing - which probably is why it’s listed under debugging.
Below is the DataBlock definition from one of the image data loaders, with the subsequent summary call.
dblock = DataBlock(
    blocks=(ImageBlock, CategoryBlock),
    splitter=RandomSplitter(0.2, seed=None),
    get_y=RegexLabeller(r"(.+)_\d+.jpg$"),
    item_tfms=[Resize(460)],
    batch_tfms=[
        *aug_transforms(size=224, min_scale=0.75),
        Normalize.from_stats(*imagenet_stats),
    ],
)

dblock.summary(fnames, show_batch=False)
Setting-up type transforms pipelines
Collecting items from (#7390) [Path('images/Bombay_126.jpg'),Path('images/havanese_6.jpg'),Path('images/Siamese_46.jpg'),Path('images/american_pit_bull_terrier_138.jpg'),Path('images/pomeranian_171.jpg'),Path('images/leonberger_58.jpg'),Path('images/Russian_Blue_164.jpg'),Path('images/chihuahua_2.jpg'),Path('images/german_shorthaired_128.jpg'),Path('images/great_pyrenees_77.jpg')...]
Found 7390 items
2 datasets of sizes 5912,1478
Setting up Pipeline: PILBase.create
Setting up Pipeline: RegexLabeller -> Categorize

Building one sample
  Pipeline: PILBase.create
    starting from
      /home/henrik/.fastai/data/oxford-iiit-pet/images/boxer_145.jpg
    applying PILBase.create gives
      PILImage mode=RGB size=334x500
  Pipeline: RegexLabeller -> Categorize
    starting from
      /home/henrik/.fastai/data/oxford-iiit-pet/images/boxer_145.jpg
    applying RegexLabeller gives
      /home/henrik/.fastai/data/oxford-iiit-pet/images/boxer
    applying Categorize gives
      TensorCategory(16)

Final sample: (PILImage mode=RGB size=334x500, TensorCategory(16))


Setting up after_item: Pipeline: Resize -> ToTensor
Setting up before_batch: Pipeline:
Setting up after_batch: Pipeline: IntToFloatTensor -> AffineCoordTfm -> RandomResizedCropGPU -> LightingTfm -> Normalize

Building one batch
Applying item_tfms to the first sample:
  Pipeline: Resize -> ToTensor
    starting from
      (PILImage mode=RGB size=334x500, TensorCategory(16))
    applying Resize gives
      (PILImage mode=RGB size=460x460, TensorCategory(16))
    applying ToTensor gives
      (TensorImage of size 3x460x460, TensorCategory(16))

Adding the next 3 samples

No before_batch transform to apply

Collating items in a batch

Applying batch_tfms to the batch built
  Pipeline: IntToFloatTensor -> AffineCoordTfm -> RandomResizedCropGPU -> LightingTfm -> Normalize
    starting from
      (TensorImage of size 4x3x460x460, TensorCategory([16,  0, 33,  8], device='cuda:0'))
    applying IntToFloatTensor gives
      (TensorImage of size 4x3x460x460, TensorCategory([16,  0, 33,  8], device='cuda:0'))
    applying AffineCoordTfm gives
      (TensorImage of size 4x3x460x460, TensorCategory([16,  0, 33,  8], device='cuda:0'))
    applying RandomResizedCropGPU gives
      (TensorImage of size 4x3x224x224, TensorCategory([16,  0, 33,  8], device='cuda:0'))
    applying LightingTfm gives
      (TensorImage of size 4x3x224x224, TensorCategory([16,  0, 33,  8], device='cuda:0'))
    applying Normalize gives
      (TensorImage of size 4x3x224x224, TensorCategory([16,  0, 33,  8], device='cuda:0'))
This really is very nice, several things happend here. One, we got a pretty good overview of what actually takes place inside the data loader. Two, we have tested all the functionality we created. Three, we get to visually inspect the results with show_batch. This is super handy!
Fast AI implementation notes
disclaimer: just some stray thoughts coming up, it’s safe to skip this paragraph
It almost feels like a sort of context manager interface here would be nicer when you create your data loader.
    with ImageDataLoaders.from_path_re(...) as dblock:
        dls = DataLoaders.from_dblock(dblock, path, ...)
Maybe, maybe not - getting the DataBlock for inspection is surely useful. Another option is to implement the summary for a data loader or DataLoaders, Which is almost what happens inside anyway.
It would also be helpful if there was some convention around the summary type functions - i.g. show_training_loop could have been name summary as well.
Cheating (but only a little)
Why cheat? I usually work with the learner either from one of the data loaders or defined some other way. And it is just really helpful to have the summary function available.
The following summary function is very much a copy - of the DataBlock/summary function - but maybe this is a better place to have the summary function? And I guess even pushing it into the individual DataLoader would enable you to inspect training, validation etc. Anyway, with patch its super easy to have your own functionality.
from fastai2.data.block import _apply_pipeline


@patch
def summary(self: DataLoaders, bs=4, show_batch=False, **kwargs):
    "Steps through the transform pipeline for one batch, and optionally calls `show_batch(**kwargs)` on the transient `Dataloaders`."
    print(f"Setting-up type transforms pipelines")
    print("\nBuilding one sample")
    for tl in self.train_ds.tls:
        _apply_pipeline(tl.tfms, get_first(self.train.items))
    print(f"\nFinal sample: {self.train_ds[0]}\n\n")

    dls = self
    print("\nBuilding one batch")
    if len([f for f in dls.train.after_item.fs if f.name != "noop"]) != 0:
        print("Applying item_tfms to the first sample:")
        s = [_apply_pipeline(dls.train.after_item, self.train_ds[0])]
        print(f"\nAdding the next {bs-1} samples")
        s += [dls.train.after_item(self.train_ds[i]) for i in range(1, bs)]
    else:
        print("No item_tfms to apply")
        s = [dls.train.after_item(self.train_ds[i]) for i in range(bs)]

    if len([f for f in dls.train.before_batch.fs if f.name != "noop"]) != 0:
        print("\nApplying before_batch to the list of samples")
        s = _apply_pipeline(dls.train.before_batch, s)
    else:
        print("\nNo before_batch transform to apply")

    print("\nCollating items in a batch")
    try:
        b = dls.train.create_batch(s)
        b = retain_types(b, s[0] if is_listy(s) else s)
    except Exception as e:
        print("Error! It's not possible to collate your items in a batch")
        why = _find_fail_collate(s)
        print(
            "Make sure all parts of your samples are tensors of the same size"
            if why is None
            else why
        )
        raise e

    if len([f for f in dls.train.after_batch.fs if f.name != "noop"]) != 0:
        print("\nApplying batch_tfms to the batch built")
        b = to_device(b, dls.device)
        b = _apply_pipeline(dls.train.after_batch, b)
    else:
        print("\nNo batch_tfms to apply")

    if show_batch:
        dls.show_batch(**kwargs)
And now we are ready to call summary but on our data loader.
dls.summary()
Setting-up type transforms pipelines

Building one sample
  Pipeline: PILBase.create
    starting from
      /home/henrik/.fastai/data/oxford-iiit-pet/images/Sphynx_20.jpg
    applying PILBase.create gives
      PILImage mode=RGB size=334x500
  Pipeline: partial -> Categorize
    starting from
      /home/henrik/.fastai/data/oxford-iiit-pet/images/Sphynx_20.jpg
    applying partial gives
      Sphynx
    applying Categorize gives
      TensorCategory(11)

Final sample: (PILImage mode=RGB size=334x500, TensorCategory(11))


Building one batch
Applying item_tfms to the first sample:
  Pipeline: Resize -> ToTensor
    starting from
      (PILImage mode=RGB size=334x500, TensorCategory(11))
    applying Resize gives
      (PILImage mode=RGB size=460x460, TensorCategory(11))
    applying ToTensor gives
      (TensorImage of size 3x460x460, TensorCategory(11))

Adding the next 3 samples

No before_batch transform to apply

Collating items in a batch

Applying batch_tfms to the batch built
  Pipeline: IntToFloatTensor -> AffineCoordTfm -> RandomResizedCropGPU -> LightingTfm -> Normalize
    starting from
      (TensorImage of size 4x3x460x460, TensorCategory([11, 24, 24, 33], device='cuda:0'))
    applying IntToFloatTensor gives
      (TensorImage of size 4x3x460x460, TensorCategory([11, 24, 24, 33], device='cuda:0'))
    applying AffineCoordTfm gives
      (TensorImage of size 4x3x460x460, TensorCategory([11, 24, 24, 33], device='cuda:0'))
    applying RandomResizedCropGPU gives
      (TensorImage of size 4x3x224x224, TensorCategory([11, 24, 24, 33], device='cuda:0'))
    applying LightingTfm gives
      (TensorImage of size 4x3x224x224, TensorCategory([11, 24, 24, 33], device='cuda:0'))
    applying Normalize gives
      (TensorImage of size 4x3x224x224, TensorCategory([11, 24, 24, 33], device='cuda:0'))
Fast AI 2 Transform
Finally lets create our own transform - one which does nothing but prints when its called in the pipeline to stdout.
class IdentityTransform(Transform):
    def __init__(self, prefix=None):
        self.prefix = prefix or ""
    def encodes(self, o):
        print(f"{self.prefix} encodes {o.__class__}")
        return o
    def decodes(self, o):
        print(f"{self.prefix} decodes {o.__class__}")
        return o
This is where it gets interesting, we apply the Identity transform to all the places we can.
dls = ImageDataLoaders.from_name_re(
    path, fnames, pat=r'(.+)_\d+.jpg$',
    item_tfms=[Resize(460), IdentityTransform(prefix="item_tfms")], bs=bs,
    batch_tfms=[*aug_transforms(size=224, min_scale=0.75), Normalize.from_stats(*imagenet_stats), IdentityTransform(prefix='batch_tfms')])
item_tfms encodes <class 'fastai2.vision.core.PILImage'>
item_tfms encodes <class 'fastai2.torch_core.TensorCategory'>
batch_tfms encodes <class 'fastai2.torch_core.TensorImage'>
batch_tfms encodes <class 'fastai2.torch_core.TensorCategory'>
Here we can see, because the framework tries to load a small batch to find out if it all is working. That we start with PILIMages, the first type of object right after load, because we use an external library to load images. Then it’s converted into a TensorImage for actual processing on the GPU by Pytorch, but this happens first once it hits the batch stage.
As it happens from_name_re ends up calling from_path_func where the DataBlock is created.
ImageDataLoaders.from_path_func??
Signature:
ImageDataLoaders.from_path_func(
    path,
    fnames,
    label_func,
    valid_pct=0.2,
    seed=None,
    item_tfms=None,
    batch_tfms=None,
    bs=64,
    val_bs=None,
    shuffle_train=True,
    device=None,
)
Source:
    @classmethod
    @delegates(DataLoaders.from_dblock)
    def from_path_func(cls, path, fnames, label_func, valid_pct=0.2, seed=None, item_tfms=None, batch_tfms=None, **kwargs):
        "Create from list of `fnames` in `path`s with `label_func`"
        dblock = DataBlock(blocks=(ImageBlock, CategoryBlock),
                           splitter=RandomSplitter(valid_pct, seed=seed),
                           get_y=label_func,
                           item_tfms=item_tfms,
                           batch_tfms=batch_tfms)
        return cls.from_dblock(dblock, fnames, path=path, **kwargs)
File:      ~/work/fastai2/fastai2/vision/data.py
Type:      method
ImageBlock??
Signature: ImageBlock(cls=<class 'fastai2.vision.core.PILImage'>)
Source:
def ImageBlock(cls=PILImage):
    "A `TransformBlock` for images of `cls`"
    return TransformBlock(type_tfms=cls.create, batch_tfms=IntToFloatTensor)
File:      ~/work/fastai2/fastai2/vision/data.py
Type:      function
Note that the DataBlock allows full control, but in our helloworld example we will accept the defaults for now.
Because all images are created with an ImageBlock, they are created using the cls.create during the type transformation. And during this part they will also be turned from PILIMages into tensors, which are more useful for our later work.
dls.show_batch(max_n=4, figsize=(7,6))
item_tfms encodes <class 'fastai2.vision.core.PILImage'>
item_tfms encodes <class 'fastai2.torch_core.TensorCategory'>
item_tfms encodes <class 'fastai2.vision.core.PILImage'>
item_tfms encodes <class 'fastai2.torch_core.TensorCategory'>
item_tfms encodes <class 'fastai2.vision.core.PILImage'>
item_tfms encodes <class 'fastai2.torch_core.TensorCategory'>
item_tfms encodes <class 'fastai2.vision.core.PILImage'>
item_tfms encodes <class 'fastai2.torch_core.TensorCategory'>
batch_tfms encodes <class 'fastai2.torch_core.TensorImage'>
batch_tfms encodes <class 'fastai2.torch_core.TensorCategory'>
batch_tfms decodes <class 'fastai2.torch_core.TensorImage'>
batch_tfms decodes <class 'fastai2.torch_core.TensorCategory'>
item_tfms decodes <class 'fastai2.torch_core.TensorImage'>
item_tfms decodes <class 'fastai2.torch_core.TensorCategory'>
item_tfms decodes <class 'fastai2.torch_core.TensorImage'>
item_tfms decodes <class 'fastai2.torch_core.TensorCategory'>
item_tfms decodes <class 'fastai2.torch_core.TensorImage'>
item_tfms decodes <class 'fastai2.torch_core.TensorCategory'>
item_tfms decodes <class 'fastai2.torch_core.TensorImage'>
item_tfms decodes <class 'fastai2.torch_core.TensorCategory'>
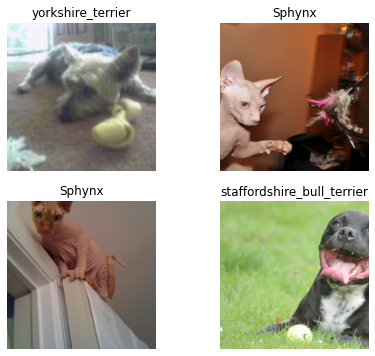
Try one call of show_batch and you’ll find another neat feature, the transforms flows both ways. First we create the batch - applying all transformas - and then we reverse the order decoding to be able to visualise the batch. (item_tfms->batch_tfms –> back to item_tfms) Neat!
This flexibility during transformation is a real gift, it allows you to keep a flexible pipeline for longer. Keeping you data closer to the ‘truth’ - and applying the transformation at the very last minute. In the examples from the library, or course if you have been following that, are all quite simple and works - obviously - straight out of the box. But if you have data which looks different, i.e. not 2D images, you will need to be creative - this library works with you and not against you.
4 layers of transformations
Ok, so far so good, we have clearly identified four layers of transformations one for initial item type transformation, item batch transformation, one for later item transformations and one for final batch transformations - 11 to go according to the paper. Maybe there is an extra ‘indirect’ level here due to the transform lists you can apply? Also notice that both item_tfms and batch_tfms take lists of transformations, opening up advanced transformations while at the same time keeping it flexible.
FastAI 2 imports caveat
It is important to note that the way you import from Fast AI matters. You might import a specific class but if you miss the augmentations you might end up with a library which doesn’t actually work. Generally you want to use the .all imports as they tend to import the right modules.
There is a difference between these two:
    from fastai2.learner import Learner
    Learner??
and
    from fastai2.vision.all import *
    Learner??
I.e. one has to_fp16 from fastai2.callback the other doesn’t. Just a little something to get used to, double check your code if things look odd and embrace it.
Concluding remarks
You should always use the summary functions while you are actively developing your transformations. They are insanely useful for answering questions about where what happens. It is not just about performance but also correctness - did you apply the transformations in the right order? Are we missing something which seems obvious?
My next steps
It’s clear that there are many more ways you can apply transformations to the FastAI pipeline. I will in a future post dive into the callbacks - where many of your transforms will go. And also the use of contextmanager for handling situations where you want to reset after the action is completed - the canonical example of not having to remember to close a file after use.
Links
The documentation for the development version of Fast AI 2. This link will change once its out of alpha - but currently docs.fast.ai points to version 1 of the library.
Pytorch currently using 1.5.0, but unless there are breaking changes, I’ll keep it updated.